Miyerkules, Oktubre 12, 2016

Lesson 14

Maximizing the use of LCD, LED projector and the CHALKBOARD
The Chalkboard
Except in extremely deprived classrooms, every classroom has a chalkboard. In fact, a school may have no computer, radio, TV, etc. but it will always have a chalkboard.

Following Practices of using Chalkboard
1.      Write clearly and legibly on the board.
2.      It helps if you have a hard copy of your chalkboard diagram or outline.
3.      Don’t crowd your notes on the board.
4.      Make use colored chalk to highlight key points.
5.      Do not turn your back to your class while you write on the chalkboard.
6.      For the sake of order and clarity, start to write from the left side of   the board going right.
7.      If you teach the Grades and you think the lines on the chalkboard are needed for writing exercises.
8.      Look at your board work from all corners of the room to test if the pupils from all sides of the room can read your board work.
9.      If there is glare on the chalkboard at certain times of the day , a curtain on the window may solve the problem.
10.  Make full use of the chalkboard.

CHALKBOARD TECHNIQUES
ü  Sharpen your chalk to get good line quality.
ü  Use dots “aiming points “. This keeps writing level.
ü  Make all writing or printing between 2 or 4 inches high for legibility.
ü  Stand with your elbow high, move along as you write.
ü  When using colored chalk, use soft chalk so that it can be erased easily.
PROJECTOR

A projector is a device that uses light and lenses to take an image and project a magnified image onto a larger screen or wall.

The LCD Projector
LCD (Liquid Crystal Display) is a thin , flat panel used for electronically displaying information such as text, images and moving picture. Its uses include monitor for Computers, Televisions , Instrument panels Gaming devices etc. Using polarization of lights to display objects.

Gene Dolgoff – is credited with developing the LCD projector.
To display images, LCD (liquid-crystal display) projectors typically send light from a metal-halide lamp through a prism or series of dichroic filters that separates light to three polysilicon panels.
As polarized light passes through the panels (combination of polarizer, LCD panel and analyzer), individual pixels can be opened to allow light to pass or closed to block the light.

The LED Projector
Instead of a traditional halogen lamp, they use (light-emitting diodes), which are more environmentally friendly and longer lasting. LED projectors use either DLP technology, replacing the color wheel and white-light lamp with red, blue, and green LEDS, or LCoS technology, which is found in handheld projectors.
Light-emitting diode projectors represent a significant advance over traditional projectors. Instead of using a bulb filled with gas at high pressure, they use an array of LEDs to generate the light that shines through, the image element to project an image.

ADVANTAGES OF USING PROJECTOR 
·         Largest possible picture
·         Smaller images a great option also
·         Low cost
·         Space saving
·         Easy to install

LIMITATIONS IN USING PROJECTOR
·         Dark room often required
·         Maintenance required
·         Installation can be more   involved
·         Separate audio system required

Lesson 13

Teaching with Visual Symbols

            Your experience of the words and the graphs convinces you that a graph a easier to understand than the words of a paragraph. A graph is “worth a thousand words.” A graph and any visual symbol for that matter such as drawings, cartoons, strip, drawings, diagrams, and maps are worth a thousand words. They are more clearly understood than mere words. Let us learn more about each of them and find out where they can be used in our lessons.

DRAWINGS


A drawing may not be the real thing but better to have a concrete visual aid than nothing. To avoid confusion, it is good that are drawing correctly represents the real thing.
One essential skill that are a teacher ought to possess in order to be understood is drawing. It helps you a lot if you are capable of doing simple freehand sketching. You will find out that as you lecture, you need to illustrate on the chalkboard. So, better start learning how to draw. The only way to learn it is to do the sketching yourself and devote some time to it. There is nothing so difficult that is not made easy when we spend at least forty hours learning and mastering it.

CARTOONS

            Another useful visual symbol that can bring novelty to our teaching is the cartoon. A first-rate cartoon tells its story metaphorically. The perfect cartoon needs no caption. The less the artist depends on words, the more effective the symbolism. The symbolism conveys the message.

Sources of Cartoons
You can easily collect cartoons for instruction. They appear often in newspapers and magazines. In class, you can give it to individual students for individual study or project it by an opaque projector. Depending on themes for the week or the month, you can display these cartoons on the bulletin board. One creative teacher arranged for a “cartoon of the month” and displayed and changed her display every end of the month.
Where to use Cartoons in Instruction
            You can also use this as a springboard for a lesson or a concluding activity. It depends on your purpose.
K to 12 Curriculum Standards and Competencies
            Go back to the K to 12 Curriculum Guide. Which can be taught with the use of a cartoon? Come up with a cartoon for a particular lesson.

STRIP DRAWINGS
                                 
             These are commonly called Comics or Comic strip. Dale (1969) asserts that a more accurate term is strip drawings. Make use of strips that are educational and entertaining at the same time.

Where to Use Strip Drawing in Instruction?
            These can serve as motivation and a starter of your lesson. It can also be given as an activity for students to express insights gained at the conclusion of a lesson.
Sources of Strip Drawing
            You can obtain strip drawings from newspaper, magazines and books.
K to 12 Curriculum Standards and Competencies
            Identify a competency where a strip drawing is appropriate. Look for an appropriate strip drawing or make one.

DIAGRAMS

            What is a diagram? It is “any line drawing that shows arrangement and relations as of parts to the whole, relative values, origins and development, chronological fluctuations, distribution, etc.” (Dale, 1969)
            If you can draw stick figures, you can easily draw the diagrams that you need as you go along. To emphasize the key points in your diagram, make use of color whether you use the chalkboard or the OHP and transparencies.

Types of Diagram
Find out what these other diagrams are. You may need them as you teach and as you go about your other teaching-related tasks.

·         Affinity diagram – used to cluster complex apparently unrelated data into natural and meaningful groups.
                                  
·         Tree diagram – used to chart out, in increasing detail, the various tasks that must be accomplished to complete a project or achieve a specific objective.
                                     

·        Fishbone diagram – It is also called cause-and-effect diagram.it is a structured from of brainstorming that graphically shows the relationship of possible cause and subcauses directly related to an identified effect/problem. It is used to analyze work-related problems.


CHARTS
            A chart is a diagrammatic representation of relationships among individuals within an organization. We can have a: 1) time chart, 2) tree or stream chart, 3) flow chart, 4) organizational chart, 5) comparison and contrast chart, 6) pareto chart and 7) run chart or trend chart.

Examples of chart
·         Time chart – is a tabular time chart that presents data in ordinal sequence.
                               

·         Tree or stream chart – depicts development, growth and change by beginning with a single course (the trunk) which spreads out into many branches: or by beginning with the many tributaries which then converge into a single channel.


·         Flowchart – is a visual way of charting or showing a process from beginning to end. It is a means of analyzing a process. By outlining every step in a process, you can begin to find inefficiencies or problem.
                                            
·   Organizational chart – shows how one part of the organization relates to other parts of the organization.


·   Comparison and Contrast chart


·        Pareto chart – is a type of bar chart, prioritized in descending order of magnitude or importance from left to right. It shows at a glance which factors are occurring most.

·         Gannt chart – is an activity time chart.
  
K to 12 Standards and Competencies
            Find out which of these charts are appropriate for any lesson in the K to 12 curriculum guide or for any teaching-related task.

GRAPHS
            There are several types of graphs. They are: 1) Circle or pie graph, 2) bar graph, 3) pictorial graph and 4) line graph
·         Pie or circle graph – recommended for showing parts of whole.

·        Bar graph – used in comparing the magnitude of similar items at different ties or seeing relative sizes of the parts of a whole.

·         Pictorial graph – makes use of picture symbols.

·         Graphic organizers – You met several graphic organizers in your subject, Principles of Teaching.
  
K to 12 Standards and Competencies
            In which lessons can you use each of these graphs?

G. MAPS
            A map is a “representation of the surface of the earth or some part of it …” (Dale, 1969)

Kinds of Map

·         Physical map - combines in a single projection data like altitude, temperature, rainfall, precipitation, vegetation, and soil.

·         Relief map – has three dimensional representations and shows contours of the physical data of the earth or part of the earth.

·         Commercial or economic map – also called product or industrial map since they show land areas in relation to economy.

·         Political map – gives detailed information about country, provinces, cities and towns, roads and highways. Oceans rivers and lakes are the main features of most political maps.

Map language
Scale -shows how much of the actual earth’s surface is represented by a given measurement on a map.
Symbols – Usually a map has legend that explains what each symbol means.
Color – the different colors of the map are part of the map language.
Geographic grids -  the entire system of these grid lines are called grid lines. These grid lines are called meridiansand parallels. A meridian is a north to south pole line. Parallels are lines drawn around a globe with all points along each line with an equal distance from the pole. Longitude is the distance in degrees of any place east or west of the prime meridian. Latitudeis the distance in degrees of any place north and south of the equator.


Poster


a large printed picture, photograph, or notice that you stick or pin to a wall or board, usually for decoration or to advertise something

Martes, Oktubre 11, 2016

Lesson 12

The Power of Film, Video and TV in the Classroom


          The Film, the video and the tv are indeed very powerful. Dale (1969) says, they can:
·Transmit a wide range of audio – visual materials, including still pictures, film, objects, specimens and drama.
·Bring models of excellence to the viewer. – We can see and hear the excellence scientist like John Glenn, the excellent speakers the master teachers who lecture and demonstrate a teaching method for professional and development of teachers.
·Bring the world of reality to the home and to the classroom through “live” broadcast or a mediated through film or videotape.
·Make us see and hear for ourselves world events as they happen. 
·Be the most believable source
·Make some program understandable and appealing to a wide variety of age and educational levels.
·Become a great equalizer of educational opportunity because programs can be presented over national and regional networks.
·Provide us with sounds and sights not easily available even to the viewer of a real event through a long shot, close ups, zoom shots, magnification and split screen made possible by the tv camera
·Can give opportunities to teachers to view themselves while they teach for purposes of self-improvement – Teacher can’t view themselves while they teach but with videocam and tv they can view themselves while they teach after.
·Can be both instructive and enjoyable.
While the film, video and tv can do so much, they have their own limitations, too.
·Television and Film our one-way communication device.
·The small screen size puts television at a disadvantage when compared with the possible size of projected motion pictures.
·Excessive tv viewing works against the development of the child’s ability to visualize and to be creative and imaginative, skills that are needed in problem solving.
·There is much violence in tv. This is the irrefutable conclusion, “viewing violence increases violence”.

Basic Procedure in the Use of TV as s supplementary Enrichment
            For enrichment of the lesson with the use of tv, we have to do the following:
-Prepare the classroom,
-Darken the room. Remember that complete darkness is not advisable for tv viewing. Your students may need to take down notes while viewing.
-The students should not be seated too near nor too far from the tv. No student should be farther from the set than the number of feet that the picture represents in inches. A 24-inch set means no students farther than 24 feet from the set. (Dale, 1969)

·  Pre-viewing activities
-Set goals and expectations.
-Link the tv lesson with past lesson and/or with your students’ experiences for integration and relevance.
-Set the rules while viewing.
-Put the film on viewing.
-Point out they key points they need to focus on.

·  Viewing
-Don’t interrupt viewing by inserting cautions and announcements you forgot to give during the previewing stage.
-Just make sure sights and sounds are clear.

·   Post-viewing
-To make them feel at ease begin by asking the following questions:
1) What do you like best in the film?
2) What part of the film makes you wonder? Doubt?
3) Does the film remind of something or someone?
4) What questions are you asking about the film?

·Go to the questions you raised at the pre-viewing stage.
·Tackle a questions raised by students at the initial stage of the post-viewing discussion.
·Ask what the students learned. Find out how they can apply what they learned. Several techniques can be used for this purpose. A simple yet effective technique is the completion of unfinished sentence.
·Summarized what was learned.

Lesson 11

Making the most of Community Resources and Field Trips

The teachers, comments given above indicate failure of the field trips conducted. This is definitely the consequence of no planning or if ever there was, planning was done poorly.
            What procedure must we follow to avoid he failed study trips described above? Let’s plan.  

Planning a field trip includes these steps:
1) preliminary planning by the teacher
2) preplanning with others going on the trip, and
3) taking the field trip itself and
 4) post-field trip follow up activities.

For preliminary planning by the teachers, Brown (1969) proposes the following:
· Make preliminary contacts, a tour on final arrangements with the place to be visited.
· Make final arrangements with the school principal about the details of the trip: time, schedule, transportation arrangements, finances, and permission slips from parents.
· Make a tentative route mutually satisfactory arrangements with other teachers if the trip will conflict with their classes.
· Prepare preliminary list of questions or other materials which will be helpful in planning with the students.

Preplanning with students joining the trip
· Discuss the objectives of the trip and write them down.
· Prepare a list of questions to send ahead to the guide of the study trip.
· Define safety and behavior standards for the journey there and for the field trip site itself.
· Discuss and decide on ways to document the trip. Everyone is expected to take notes.
· List specific objects to be seen on their way to the site, on the site of the field trip and on their way home from the site.
· Discuss appropriate dress.
· Before the trip, use a variety of learning materials in order to give each student a background for the trip.
Taking the Field Trip
· Distribute route map of places to observed.
· Upon arriving at the destination, teacher should check the group and introduce the guide.
· Special effort should be made to ensure that:
- The trip keeps to the time schedule
- The students have the opportunity to obtain answers to questions
- The group participates courteously in the entire trip
- The guide sticks closely to the list of questions.

Evaluating Field Trip
            These are questions we can ask ourselves after the field trip to evaluate the field trip we just had.
· Could the same benefits be achieved by other materials? Was it worth the time, effort, and perhaps, extra money?
Were there any unexpected problems which could be foreseen another time? Were these due to guides, students, poor planning, or unexpected trip conditions?
Were new interests developed?
Should the trip be recommended to other classes studying similar topics?

Educational Benefits Derived from a Field Trip
            Field trips can be fun and educational when they are well executed. They offer us a number of educational benefits:
1. The acquisition of lasting concepts and change in attitudes are rooted on concrete and rich experiences.
2.  Field trip bring us to the world beyond the classroom.
3.  Filed trips have a wide range of application.
4. It can bring about a lot of realization which may lead to changes in attitudes and insights.

Disadvantages of Field Trips


            These educational benefits can compensate for the drawbacks of field trips, some of which are: 1) it is costly, 2) it involves logistics, 3) it is extravagant with time, and 4) contains of element of uncertainly.

Miyerkules, Agosto 31, 2016

Lesson 10

                              Demonstration in Teaching                         (Good demonstration is Good communication)


•In demonstration, you have to use both verbal and action communication for your learners to understand what you are talking and what you are showing to them. But, a good demonstrator must present or show how a specific thing is done while following it up with an explanation. It is best for your learners to see it in actual or to do it while showing it, for them to really understand it. To be a good demonstrator you have to make your demonstration lively and interesting to get the attention of your audience so that, they would be able to participate. Once they have been participated with the topic, you can probably say that you’re a good demonstrator because there is a communication between you and your audience.

DEMONSTRATION
  ·  Is showing how a thing is done emphasizing the salient merits, utility and efficiency of concept, a method or a process or an attitude.
   ·   Demonstration is a method of presentation of skill which shows a particular procedure is performed.
  ·  Demonstration increases interest of students and persuades them to adopt recommended practices.
    ·      A good demonstrator is an audio-visual presentation. It is not enough that the teacher talks. To be effective, his/her demonstration must be accompanied by some visuals.

Guiding principles that we must observe in using demonstration as a teaching-learning experience: Edgar Dale (1969)
   1. Establish rapport.
   2. Avoid the COIK fallacy (Clear Only If Known).
   3. Watch for key points.

Planning and Preparing for Demonstration Brown (1969)
1. What are our objectives?

2.How does your class stand with respect to these objectives?

3. Is there a better way to achieve your ends?

4. Do you have access to all necessary materials and equipment to make the demonstration?

5. Are you familiar with the sequence and content of the proposed demonstration?

6. Are the time limits realistic?


Several points to observe in the actual conduct of demonstration: Dale (1969)
1. Set the tone for good communication.
2. Keep your demonstration simple.
3. Do not wander from the main ideas.
4. Check to see if your demonstration is being understood.
5. Do not hurry your demonstration.
6. Do not drag out your demonstration.
7. Conclude with a summary. 
8. Hand out written materials at the conclusion.


What questions can you ask to evaluate your classroom demonstration? Dale (1969)
1.Was your demonstration adequately and skillfully prepared?
2.Did you follow the step-by-step plan?
3.Was the demonstration itself correct?
4.Did you keep checking to see that all your students were concentrating on what you were doing?
5.Could every person see and hear?
6.Did you help students do their own generalizing?
7.Did you take enough time to demonstrate the key points
8.Did you review and summarize the key points?
9.Did your students participate in what you were doing by asking thoughtful questions at the appropriate time?
10.Did your evaluation of student learning indicate that your demonstration achieved its purpose?


Lesson 9

Teaching with Dramatized Experiences

What is a dramatized experience?  

  • A process of communication in which both participant and spectators are engaged.
  • Is something that is stirring or affecting or moving.
  • It is something that catches and holds our attention and has an emotional impact.

Formal Dramatized Experiences


1. Play- depicts life , character, or culture or a combination of all three.


2. Pageants- are usually community dramas that are based on local history, presented by local actors

Less Formal Dramatized Experiences

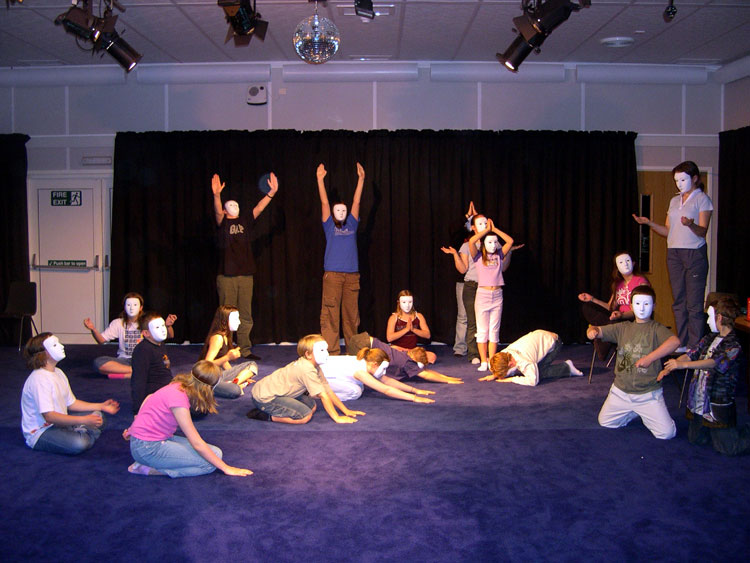
1. Pantomime- is the art of conveying a story through bodily movements only.

2. Tableau- is a picture-like scene composed of people against a background.


3. Puppets- a movable model of a person or animal used in entertainment and typically moved either by strings from above or by a hand inside it.
-unlike the regular stage play, can present ideas with extreme simplicity, without elaborate scenery or costume, yet effectively

Types of Puppets

a. The Marionette- are generally fashioned from wood and resembles a human body.

b. Shadow Puppet- flat black silhouette made from light weight cardboard and shown behind a screen.
c. Stick Puppet- as simple as a styrofoam ball head attached  to a stick, or a two-dimensional picture attached to a stick. 
d. Hand Puppet- most common type of puppet they are relatively simple to create.
e. Mouth Puppet- are distinguished from other puppets in that they have movable mouths, thus allowing the puppets to talk more realistically.
f. Rod Puppet- flat cut out figures tacked to a stick, with one or more movable parts, and operated from below the stage level by wire rods or slender sticks.
g. Glove-and-Finger Puppets- make used of gloves to which small costumed figure are attached.